Saturday, December 4, 2010

i'm thankful for wrecking bars

it started with the floor. i assume there are photos of our kitchen floor. the wandering zig-zag beige tiles made me dizzy, the tiles were cracked as per poor installation, and there was a 1" toe-busting transition step from the dining room. too long had the wood floor underneath been kept from us.

i am thankful for my 7 1/4" diamond blade because it cuts through tile and grout like a hot knife through butter. the basic strategy is to cut out the grout with the saw, then hammer and pry up the tiles and fiber-board with a flat wrecking bar. in the end, the tiles look much better as a pile of rubble in our driveway. i am thankful for the pile of rubble in my driveway that once was my kitchen floor.

dust is the biggest problem. we set up a drop-cloth "kill room" to keep the bulk of dust out of the rest of the house, and we used a combination of shop-vac, water spray bottle, and fans to control the dust as best we can. since the dust is largely composed of tiny fragments of ceramic and glass, i recommend a mask of some sort.

underneath, the wood floors are a bit beaten, but i think they will salvage nicely. they will salvage nicely when we get around to it, because apparently this is only the beginning.

intrigued by the growing pile of rubble in our driveway, our neighbor randy stopped by to see what we were doing. he is often amused by our projects. "cool pile of rubble," he observed.

"check out our floor," rebecca bragged.

"nice," randy agreed politely. "hey, if you knock out this wall, your kitchen would be totally awesome," he suggested.

"cool! that's the best idea ever," rebecca agreed. "here's a hammer," she offered making swinging motions.

i swear, it happened just like something along those lines. almost exactly similarly. in any case, the wall at the end of the kitchen is coming out. as the pictures show, we are committed - which is to say that all but the timbers and some wiring have been removed.

as it turns out, all this talk about removing walls has made us aware that we are, in fact, missing a wall that probably should not have been removed, so i suppose we'll be correcting that oversight as well.

good bye ugly tiles.


Wednesday, June 23, 2010

Wednesday, May 5, 2010

The Color Red

Rather then spend huge amounts of time and money stripping and restoring all of the bricks on the windows and chimney we decided to paint. It was important to us that the painted brick look as natural as possible and that it not come out looking like a cartoon version of brick. While doing some research I came across an extremely detailed report on the selection of pigments for red washing for the restoration of Montpelier (article on the Montpelier Curatorial and Restoration Blog). They hired several experts, did detailed colorimetric analysis and ultimately selected Benjamin Moore Mayflower Red as the most authentic pigment.

To be honest, I'm entirely over selecting colors and I have come to hate color cards. I decided that if Mayflower Red was good enough for James Madison's old mansion then it would certainly do for our little ranch-alow. Without delay or bothering to buy a sample quart I had Kelly Moore match the color came home and started painting the brick window sills.

Here are the results...


Alternatively, I considered having paint matched to hair samples from Alger, Finch and Zuri. It might not have been authentic but we do seem to have an affinity for their particular color red... I wonder what our chimeny would look like with a white stripe down the middle?


Thank you to everyone who came on Saturday. We had such a great time! We feel so lucky to be able to share our home with friends and family!

Monday, May 3, 2010

Time Lapse

At 9pm last night Mark and I danced across our newly finished floor! I can't believe it's almost done, seriously I can't. This porch has been a BIG project and for months every bit of progress has been hard won and not at all obvious to the untraied eye (note the lack of pictures between months 4-10).

1 year- Isn't it amazing?
Day 1

Day 7
Day 14


1 Month


1.5 months
4 months10 months

11 months


Monday, April 19, 2010

Fun With Photo Shop


I love our little ranchalow (ranch-bungalow) painted white! I'm currently trying to figure out the rest of the color scheme. We are planning to paint the eaves "Haint Blue". Haint's, as the southern lore has it, are the bad ghosts prone to haunting. Painting the eaves Haint Blue is said to keep them out of your house. I don't know about ghost stories but I love the effect. For the trim we are thinking a dark forest green. While playing with colors I thought I'd throw in a gravel path, some stripped awnings and window boxes.

Saturday, April 17, 2010

House Painting Part I

We started paining the house today...here are the first round of during photos.


A BIG thanks to Kieth for all of his help:)

Friday, April 16, 2010

floor sagas continued


333 ft. of lumber, 100+ concrete anchors, 100+ 1/4-20 bolts, 150+ washers, 350 or so concrete screws, 140 douglas fir toung-and-grove flooring planks, and a whole mess of nails. clearly, there is still plenty of work to be done, but we have most of a porch floor.

shown here: 1) a bit of floor and implements of destruction 2) alger enjoying the smooth transit from the back yard into the house. why is there nothing to trip over? 3) a typical anchor point, 1/4-anchor shimmed, leveled and pinned with concrete screws on both sides. this image will be history after tomorrow.

and ok, so blogger does not really facilitate layouts, so we'll just have to infer which photo goes with which comment by context.

a day of floor laying progress: as we approach the end of the porch, we witness the "last stand" 720 marshall porch tool barge... and it's gone, paving the way to further floor laying and progress in general.


Monday, April 12, 2010

wood floors and wainscoting


some time ago, there was mention of wood floors in the bathroom. as i recall, i went to the SCEC meeting for a few days, and rebecca went nuts on the bathroom floor tiles with a hammer and chisel end wrecking bar. "Good news," she said. "We do indeed have hard-wood floors in the bathroom."

of course, we called troy and took to dismantling the rest of the tiles, this time with the aid of a 71/2" circular saw equipped with a diamond blade. having done the floors, we decided to get rid of the home-depot vanity and have a go at the walls. the walls had seen some tough days. there was obvious patching, and we found more interesting electrical work. by interesting, i mean a little scary, like a bunch of wires stuffed into a small box, with no cover, behind the vanity. the wire screws were totally melted and hot (zap hot) to the touch.

as per the condition of the walls, we decided to wainscot the whole thing. as an added bonus, we used heavy trim with a little shelf running the perimeter of the bathroom. i used an interesting wedging technique with a couple of 2x4's to get the long trim pieces into place. if i'd had a free hand, i'd post a picture.

we bought the vanity from an antique shop. we had a piece of glass cut for the top, drilled a few holes in it, ran some plumbing, and voila. sink.

the light fixture appears innocent enough, but we are particularly proud of it as well. rebecca found the fixture itself on some restoration site. after a few trips to OSH, we found electrical bits that fit well enough. after a few trips to the attic, i managed to set up a fixture box that would work for the fixture. we then removed the old hanging lights and installed a junction box where the previous owner had spliced the lamp-cord in the open attic. done. also note, please, the tricky photography - we can see that the light is on, yet we can also see all the features of the lovely fixture. how does he do that?

do not miss, of course, the beautiful reclaimed douglas fir floor. i am sure there will be more of that to see in the kitchen.


For the record...


I realize we haven't updated the blog in a LONG time but the camera has been broken. We have lots of good things to show you and once Mark figures out how to work the new SLR digital camera I bought him for his Birthday we will overwhelm our readers (all 2 of us) with copious photos documenting our progress.

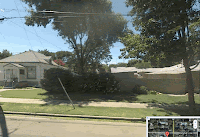
Before we have our big reveal I thought I would post the old G-Maps pictures of our house (at least 1.5 years old). Actually, we are currently trying to paint the exterior (the weather is not cooperating) so the outside currently looks a lot worse then it does in these photos.