Saturday, June 22, 2013

Vintage 1950s Sofa Reupholstery Project: Mint Green Velvet Part 2

Done! Well, my part is done. I dropped off the remainder of the material at the upholster to have the sofa cushions made. They should be back in ~1 week. I love the Sunbrella mint green outdoor velvet, but it is WAY too thick for my little sewing machine to handle (in multiple layers, the just manageable).


I finished the edges using this ply grip . Which is awesome.


The decking was originally tensioned with buttons. I'm kicking myself for not taking more pictures of the 'during'. A cord was nailed into place and run lengthwise on the top 1/3 of the sofa (under the dust cover). I tied the buttons with waxed string.


For the bottom edge, I choose to do a double welt in contrasting black linen. If I 1) had enough of the mint green velvet, and 2) could have made decent double welted velvet piping I would have gone with the self welting. I had experimented with the velvet double welt, but the fabric sort of rolls out of shape and is difficult to get a nice snug welt. I think the black works though.


Friday, June 14, 2013

Vintage 1950s Sofa Reupholstery: Mint Green Velvet Part 1

A little over a year ago I fell in love with the vintage sofa featured in my favorite blog Little Green Notebook. So much in love, in fact, that when I made up my mind to find and/or make a ming green vintage sofa of my very own.  


As luck would have it, after a few short months of searching I found this classic 1950s  beauty at an estate sale. The springs and frame were in great shape, but the cover, cushions and woodwork needed love. 


After nearly 6 months of back and forth deliberation (sure I love mint green velvet now, but will I tomorrow?) I purchased 10 yards of Sunbrella's mint green outdoor velvet. That big decision made, I hauled my pretty little sofa out side and began tearing her apart. 

The first step was to strip away what was left of the 1950s varnish using steel wool and varnish thinner (acetone). 

Once stripped, I sanded, and sanded and sanded. I applied one coat of Minwax pre-stain wood conditioner followed by 2 coats of Minwax dark walnut stain. I applied the stain with a brush and allowed each of the coats to soak in completely and set for 24 hours (each). Between coats I sanded with 400 grit sand paper and rubbed out any excessive tacky-ness using a smooth cloth and acetone. After the last coat of stain was dried I applied three additional coats of clear polyurethane finish (sanding in between coats). 


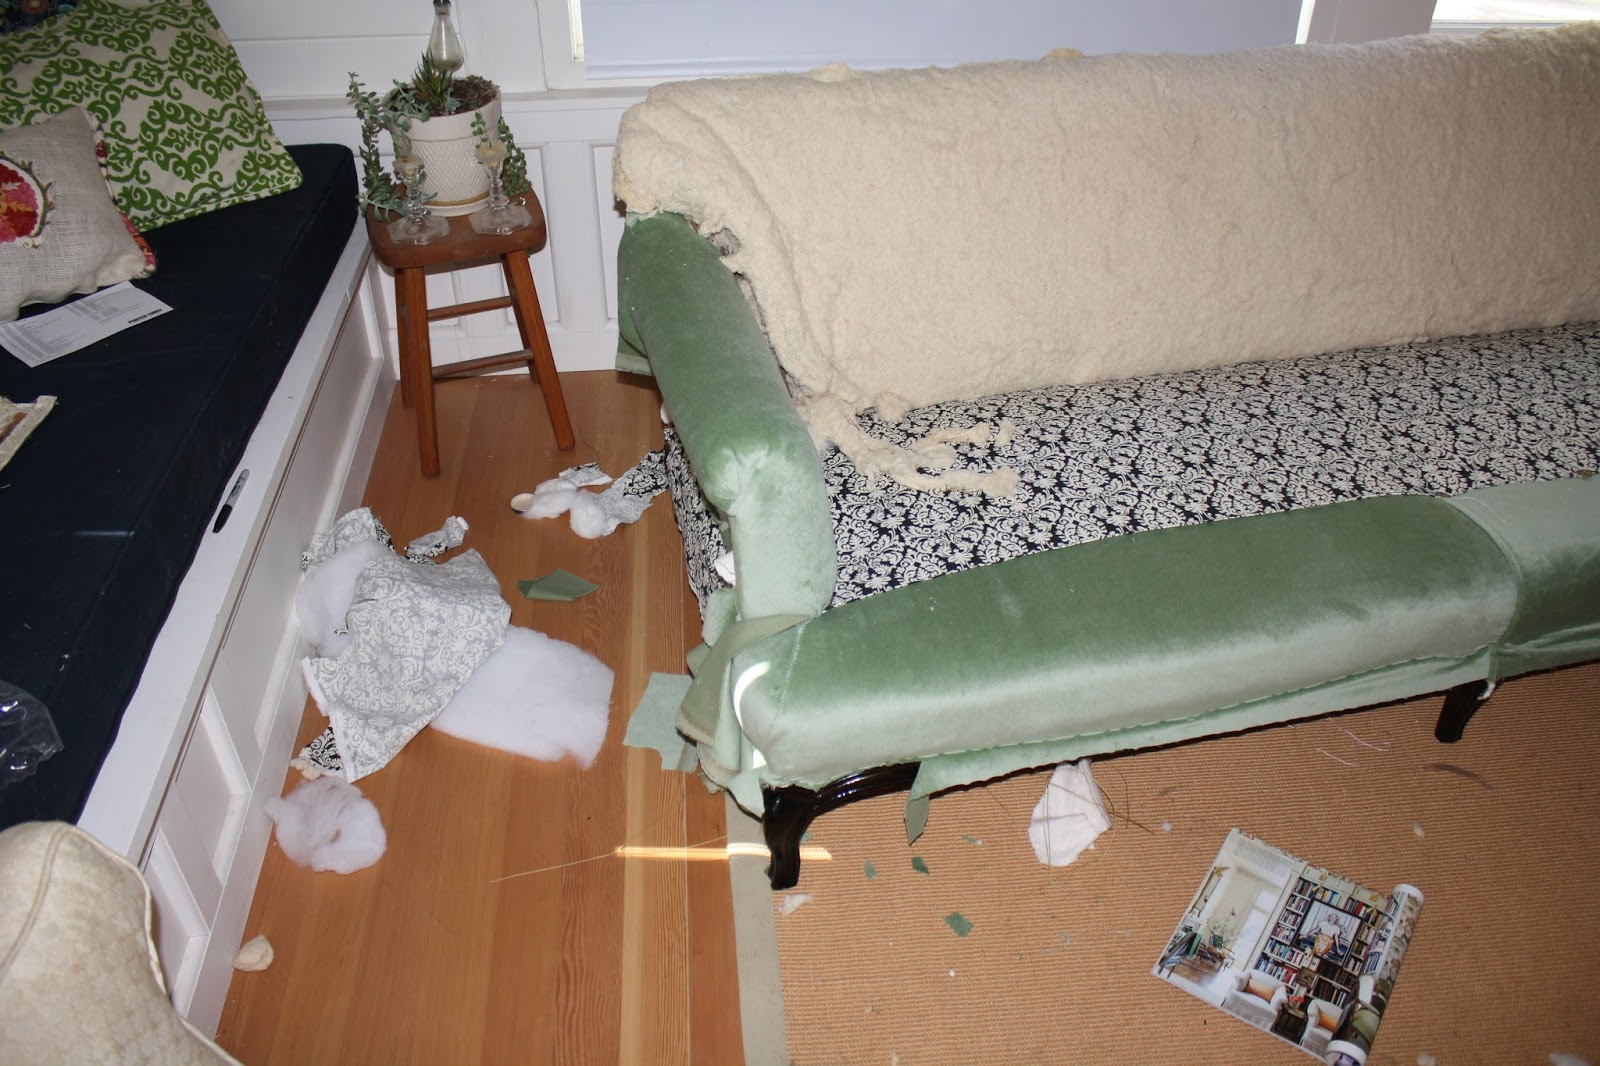
Once the legs were dry I finished the sad process of tearing down the sofa. Once the material arrived, I constructed/sewed the deck. After the deck was in placed I was secured/sewed the deck corners and then added the inside arm.  Here are a few of the in progress photos: 


I love the fabric, but it's really difficult to work with, and I had an especially difficult time making the little strip of welting I used in the decking. This isn't my first upholstery project, but in the past I've done everything by hand (read without a hammer and tacks). For this project I went big and bought an air compressor and 100 psi upholstery staple gun. I thought it was a little frivolous at the time, but as it turns out this job would have been impossible without it. 

I'll post more pictures as I progress:) 

Tuesday, January 3, 2012

Under New Management


It's been over a year since our last post...there have been A LOT of changes around our little house this year. Not all of them good. As the post implies there has been a change of guard at Alger's Castle. Alger passed away in early December. We miss him very much and are so grateful for the time we spent with him and of course for his expert management of his castle.

So the torch has been passed. Meet Argus, our new puppy/boss of the castle. He has big paws to fill but I'm sure he is up for the task.


He's already been a huge help. He loves to paint and BE painted.


And now for the big reveal. We have one or two small projects left in the kitchen, but mostly it's DONE. We are really happy with the way it's turned out. I'll post more photos' in another post (Blogger's formatting options for multiple photo's are annoyingly limited).


turquoise hanging window + "haint" blue ceiling = love


turquoise door
Butcher block counter top insert, so handy. 
Our 1960s yellow wicker table and chairs. 

Progress Report 2011 - Kitchen

More kitchen pictures:


Progress Report 2011 - Hallway and Dining Room


Progress Report 2011 - Entryway and Living Room


Saturday, December 31, 2011

Some Before Pictures...

Just to put our progress in perspective here are some pictures we found on Zillow (posted by the previous owners). These pictures don't actually do justice to just how bad the kitchen was before we completely gutted it (which was relatively easy as the cabinets were hung with finishing nails).